

Best Quality 3D TPU Heat Transfer Label Guide for Durable Custom Designs
2026-10-24
When it comes to custom apparel and accessories, the details make all the difference—and nothing elevates a design quite like a 3D TPU heat transfer label. These labels bring a tactile, dimensional finish that standard prints simply can't match, all while standing up to repeated wear and washing. Whether you're exploring new branding options or tired of labels that crack and fade, this guide walks you through everything worth knowing. From material selection to application tricks, we’ll show you how to achieve durable, high-end results. And if you're serious about quality, keep an eye on Victorygen heat transfer label—a name that keeps popping up among professionals for consistent performance. Ready to see what 3D TPU can do for your next project?
The Real Difference Between Flat and Raised TPU Labels
Flat TPU labels sit almost flush with the surface they are applied to, giving a smooth, understated finish that works well on minimalist designs or where a label shouldn't interfere with the product's handling. They are created by pouring or pressing TPU into a shallow mold, so the resulting label has very little height above the material it's attached to. This makes them feel almost like part of the garment or gear itself, rather than an added element.
Raised TPU labels, on the other hand, are designed to stand out physically. They have a noticeable three-dimensional profile, often with thicker edges and more depth in the lettering or logo. This extra height makes them catch the light differently and gives a tactile quality that invites touch. People often choose raised labels when they want the branding to be a prominent feature, not just a quiet detail.
In practical use, the difference goes beyond looks. Flat labels are less likely to snag on other items or cause friction against the skin, which is useful for inner wear or items that get packed tightly. Raised labels, while more visually assertive, can be more prone to catching on things or showing wear on the highest points over time. The choice really depends on whether you want the label to blend in or to make a statement every time someone sees or feels it.
What Actually Happens to 3D Labels in the Wash
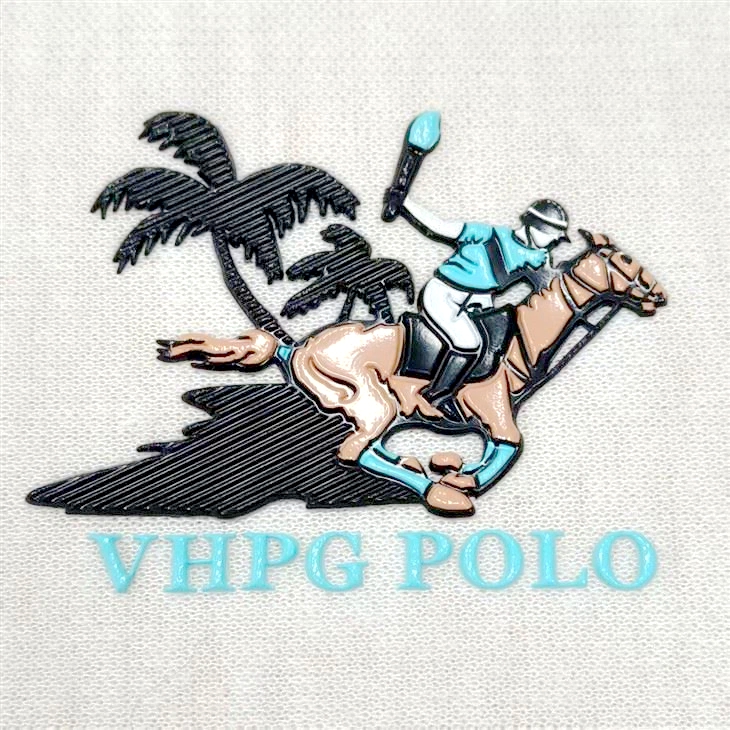
Most 3D labels start out tough, but repeated trips through the wash put every layer under stress. The raised design is usually molded from silicone or a thick PVC, then bonded to the garment with a heat-activated adhesive. Warm water alone rarely causes immediate failure—the real trouble begins when detergent and friction work together. Over multiple cycles, the edges of the label lift microscopically, letting soapy water creep underneath the adhesive. Once that happens, the bond weakens from the outside in, and the label starts to curl or peel away from the fabric.
The raised surface also takes a beating from contact with zippers, buttons, and the drum itself. Small abrasions on the 3D lettering can make colors look dull, and dark fabrics may pick up tiny fibers that cling to the label's textured surface. Drying adds another layer of strain: high heat can cause the silicone or PVC to stiffen slightly or lose some elasticity. If the label is on a performance fabric, the mismatch in how the label and the shirt expand and contract in heat can speed up cracking at the edges.
Not every 3D label fails—many survive dozens of washes if the garment is turned inside out and washed on a cool, gentle cycle. But once the adhesive layer is compromised, no amount of pressing will truly restore the original bond. The label might look fine when dry and lift again the moment it gets wet. That's why you'll often see older items with the 3D logo still attached but slightly raised at one corner: the wash hasn't ripped it off, just quietly loosened its grip.
Turning Detailed Logos into Clean Dimensional Prints
Logos with heavy gradients, thin strokes, and clustered elements often fall apart when translated into dimensional prints. The first step is a careful audit of what carries the brand: remove shadows and tiny gaps that would clog, thicken the core shapes slightly, and rebuild any lettering at a size that survives embossing or raised ink.
After simplifying, the real control comes from layer separation. Instead of forcing every detail into one height, split the design into two or three depth levels. Background plates sit low, key symbols rise a bit more, and the wordmark gets the highest relief if it's the main identifier. This keeps the print readable from arm's length while still feeling tactile up close.
Material choice plays a final, often overlooked role. Matte surfaces with a slight tooth hold dimensional ink better than glossy stocks, and softer substrates allow deeper debossing without cracking. The end result is a logo that doesn't just look clean—it feels intentional, with every raised edge doing a job instead of fighting for attention.
Getting the Press Time Right for Strong Adhesion
Adhesion strength doesn’t come from applying maximum pressure—it comes from applying pressure for the right amount of time. If the press time is too short, the adhesive film may not fully flow into the surface pores of both substrates, leaving microscopic gaps that weaken the bond. If it’s too long, you risk squeezing out too much adhesive from the joint, especially with low-viscosity formulations, which can create starved bond lines and reduce overall durability.
The ideal press time depends on several factors: adhesive type, substrate porosity, ambient temperature, and the thickness of the applied layer. For example, fast-curing cyanoacrylates may need only seconds of firm contact, while polyurethane or epoxy systems often require several minutes under consistent pressure to reach their full bonding potential. A practical way to confirm the right window is to run a small test batch with varied press times, then peel or shear the samples to see where the failure mode shifts from adhesive separation to cohesive substrate tearing.
Once you find the sweet spot, keep it consistent. Use a timer, jig, or pneumatic press rather than relying on hand pressure and guesswork. Even a few seconds of variation can change the bond performance, especially on temperature-sensitive or porous materials. Document the press time for each adhesive-substrate combination in your shop, and you’ll avoid the common trap of blaming the glue when the real issue was simply when you let go.
Avoiding Edge Lift on Stretchy Performance Fabrics
Edge lift on stretchy performance fabrics usually comes down to the fabric's memory and how it reacts to being cut and stitched. The raw edge wants to curl back to its relaxed state, especially on highly elastic knits with spandex or elastane. Instead of fighting that tendency with heavy interfacing, work with it by stabilizing just the seam allowance. A lightweight fusible knit stay tape or a strip of water-soluble stabilizer along the edge can hold things flat while you sew, then disappear or remain soft after washing.
Your needle and machine settings matter more than you might think. A ballpoint or stretch needle slides between fibers rather than piercing them, which reduces the micro-tearing that encourages edges to roll. Dial down the presser foot pressure and, if your machine has it, increase the differential feed slightly. This keeps the top layer from being pushed forward and the bottom layer from being stretched out. Test on scraps first—every performance knit has its own personality.
For a durable fix, consider finishing the edge with a coverstitch or a narrow elastic binding. Both methods enclose the raw edge completely, so there's nothing left to lift. If you prefer a folded hem, steam it gently before stitching and avoid stretching the fabric as you guide it through the machine. A touch of temporary fabric adhesive or wash-away tape can hold the fold in place long enough to sew without adding bulk or stiffness.
Caring for Finished Garments Without Dulling the Finish
The finish on a garment—whether it's a waxed cotton jacket, a coated technical shell, or a softly brushed flannel—breaks down fastest when it's scrubbed too hard or washed in water that's too hot. Turn the piece inside out before it goes into the machine, fasten all zippers and buttons, and use a short, gentle cycle with cold water. This keeps the outer surface from rubbing against other fabrics and preserves the natural oils or coatings that give the finish its depth.
Skip the fabric softener and any detergent with optical brighteners or bleach alternatives. These additives leave a residue that sits on the fibers and can make a matte finish look cloudy or a satin finish feel sticky. Instead, use a small amount of a mild liquid soap designed for wool or delicate fabrics. If the garment has a water-repellent finish, run a second rinse cycle to clear away any leftover soap, then let it drip dry away from direct heat.
Heat is the fastest way to dull a finish. Tumble drying on high or ironing directly on the face of the fabric can flatten the texture and create shiny patches that are impossible to reverse. Hang the garment on a padded hanger or lay it flat on a drying rack, reshape the seams while it's still damp, and if it needs a refresh, use a steamer from a distance rather than pressing with an iron.
FAQ
The raised, dimensional surface gives a tactile feel and a premium look that flat prints can't match. The material is also more flexible and resistant to cracking, so it works well on garments that stretch or get washed often.
Yes, when applied correctly. High-quality TPU labels hold up to dozens of wash cycles without peeling, fading, or losing their shape. The key is proper heat pressing and letting the adhesive fully bond before the first wash.
Bold logos, monograms, small emblems, and designs with clear edges tend to work best. Very fine details can be lost during the molding process, so it's usually better to simplify intricate artwork and keep the raised areas distinct.
They are a strong choice for activewear and performance fabrics. TPU has natural elasticity, which allows the label to flex with the fabric instead of cracking or lifting. Just make sure the adhesive is compatible with the specific fabric coating.
Use a heat press rather than a household iron for even temperature and pressure. Set the recommended time, temperature, and pressure for the specific TPU product, cover with a protective sheet, and press in one smooth cycle. After pressing, let it cool before peeling the carrier if cold peel is specified.
Check the thickness consistency, edge sharpness, and the quality of the adhesive backing. Ask for wash test reports or samples. A good supplier will also offer custom color matching and advise on the best release liner for your design.
Yes, but the heat press settings need to be adjusted. Leather can be heat sensitive, while nylon needs lower temperature to avoid scorching. Test on a hidden area first, and use a lower temp with a longer dwell time when needed.
Conclusion
Focus on the real difference between flat and raised TPU labels. Flat versions sit nearly flush with the fabric while raised 3D TPU adds a tactile bump that makes logos pop, but that bump also changes how the label reacts in a washing machine. Quality 3D TPU holds up through dozens of cycles without cracking or peeling if the adhesive is properly cured. Many people worry about detailed logos losing clarity when turned into dimensional prints. The trick is to simplify tiny gaps and thin lines just enough, so the molten TPU fills the mold cleanly instead of bridging or blurring. A well-made 3D label keeps sharp edges and readable text even at small sizes.
Press time is often underestimated. Too short and the adhesive never fully bonds, leading to corner lift after a few wears. Too long and you risk scorching the TPU or making it too shiny. On stretchy performance fabrics, edge lift is the classic failure. Using a lower temperature with a slightly longer dwell time, plus firm even pressure, helps the adhesive flow into the fabric weave without over-compressing. After application, let the garment cool flat before folding. For washing, turn items inside out and avoid fabric softeners, which can leave a film that dulls the dimensional finish. Cold water and air drying keep the raised edges crisp for years.
Contact Us
Contact Person: Wang Song Lin
Email: [email protected]
Tel/WhatsApp: +8613751282193
Website: https://www.heat-transferprinting.com/